Monday, March 28, 2011

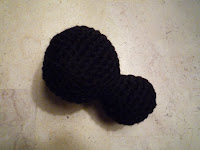
It' here! I won a giveaway!!!

I participated in a blog giveaway over at My Tangled Threads and won! It is a cute little cosemtic bag, some cotton yarn, and some stitch markers. Thanks Angela! I would've gotten this post up sooner but I hate to complain, but here goes....I was sick all weekend. Being a teacher, it's in the job description that a few times a year you're going to come down with what your students have and boy did it get me good. I spent Friday going to the doctor and getting meds, then Saturday and Sunday I was a clump on the sofa trying to mend. I'm back to myself today, thanks to anitbiotics!!!

Sunday, March 27, 2011

Free spider pattern! Is's back!!

Spider! Materials: F hook, worsted weight yarn, polyester stuffung wriggly eyes Work in continuous spiral; do not join rounds This pattern is worked form the bottom of the spiders body up to the head; in one piece. ch 2 rnd. 1- 6 sc into 2nd chain from hook rnd.2-2sc into each sc, repeat around (12sc) rnd.3-1sc then 2sc in next sc; repeat around(18sc) rnd.4-2sc then 2sc in next sc; repeat around(24sc) rnd.5-3sc then2sc in next sc; repeat around(30sc) rnd.6-4 sc then 2sc in next sc; repeat around(36) rnds.7 thru 10-sc around(36sc) rnd.11- 4sc then dec. 1; repeat around(30sc) rnd.12- 3sc then dec 1; repeat around(24sc) rnd.13- 2sc then dec 1; repeat around (18sc) rnd. 14-1sc then dec.1; repeat around(12sc) shape neck: rnds.15 &16- sc around(12sc) stuff body rnd.17- 1sc then 2sc in next sc; repeat aound(18sc) rnd.18- 2sc then 2sc in next sc; repeat around(24sc) rnds. 19 thru 21- sc around(24sc) rnd.22- 2sc then dec. 1 in next sc; repeat around(18sc) rnd.23- 1sc then dec. 1 in next sc; repeat around(12sc) stuff head rnd. 24- dec. around(6 total decreases-6sc left at end of round) Fasten off; take a few small stitches to close hole; weave in ends. Here's what the body looks like completed legs(make 8) H Holding 2 strands of yarn together ch. 25; sc 3 into 2nd chain from hook; repeat until end. fasten off. sew legs to body,embroider mouth,glue or emroider eyes Do not hesitate to contact me for comments or corrections! All feedback is welcome!

Friday, March 18, 2011

My Tah-Dah moment........

Do you remember this project that I gave youa peek of back here.
Well here it is comlpleted....My Button bag


Here is the lining........


Thanks to Clara for posting the link to the pattern and you can find it here.

Sunday, March 13, 2011

Lil Uglee-Free pattern


Original pattern by Caroline Chrisco
Half the original, all the uglee!

Materials:
WW yarn
G hook
Safety eyes
Assorted pieces of felt
Polyester stuffing
Embroidery needle/thread
Yarn needle

Make 2
Chain 14
Row 1 sc in second chain from hook, the sc in each remaining chain, turn; ch.1
Row 2-13 sc in each stitch, turn; ch 1 at the end of every row.

Divide for legs:
Row 14a sc in second chain from hook and sc in next 5 stitches, turn; ch.1
Row 15a-26a repeat row 14a
Fasten off

Attach yarn to opposite, unworked side of row 14, ch.1
14b sc in second chain from hook and in next 5 stitches turn; ch.1 (you will share the middle stitch with row 14a.)
Row 15b-26b repeat row 14b
Fasten off

Match the two sides of triangle together, slipstitch around the outer edge. (you can also whip-stitch the sides together, but I like the finish the slip-stitch gives it.) I work until I have about 2 inches left to stitch together and then I work on the facial features before stuffing and I can easily embroider with my hand inside the “body”.

Design face:
Eyes:
Since this pattern can fashion more than one particular looking “Uglee” You need to decide how ugly it should be. I choose from a whole host of combinations for eyes.

*2 mis-matched somewhat circular or oblong eyes. I use quarters for larger circles and dimes for smaller. I free hand football-shaped eyes.)
*1 funny shaped eye
*A giant X for one or both eyes.

If I am working on 2 mis-matched circular eyes. I trace the pattern onto the felt. Cut it out, also cut a small notch out of the center of the piece of felt so you can slip the safety eye easily through the felt Attach the safety eye and felt. Using white embroidery floss, I fasten the felt with very fine stitches all around the edges of the felt to secure it in place. Repeat with your second eye.

Mouth:
The same “eye” philosophy applies for deciding the personality of the mouth of your Uglee. I choose from these basic mouth styles:

A “V” shaped smile
A crooked smile
A straight line

I choose to use a WW weight black yarn (RHSS) in a large eye yarn needle and stitch in the mouth.

Teeth/Tongue:
I choose from these basic teeth styles:

1,2, or 3 small square teeth
1 fang
Tongue sticking out

I fashion these the same way I do the background for the eyes. I cut out the desired shape from the felt, place it in the desired location, then stitch around the edges to fasten it securely in place.

Hair: I use two methods to design hair, you can decide which one fits your “Uglee” personality.
#1 I cut several lengths of yarn and fold them in half one at a time. Next I insert my hook to the desired location of the hair , catch the folded end of the yarn and pull through. I then slip the loose ends of yarn through the folded end and pull tight to secure in place.

#2 Curly Q’s-These can be made as long or short as you want, just adjust the length by adding or subtracting the number of chains you begin with. The three lengths I like are:
Short: chain 10; turn then 3sc in each chain until done.
Medium: chain 12; turn, then 3sc in each chain.
Long: chain 15; turn, then 3sc in each chain
Attach hair with a yarn needle to desired position on your Uglee. (Odd number of locks work best!)

Assembly:
Stuff body of Lil Uglee, I use the eraser end of a pencil to make sure the stuffing gets into the sharp angles so, your Uglee will have a nice sharp shape. Finish slip-stitching the final seam. Weave in all ends.

St. Paddy's Day Octo Ami

I made this guy the other evening because I just wanted a quick, completed project! I used the free pattern on my blog found here.


Wednesday, March 9, 2011

Blarney! It's a yarny give away!


Yarn Giveaway!
In honor of the upcoming St.Patrick's Day Holiday and mostly just for the heck of it. I'm hosting a giveaway. I was organizing my stash and had sooo many little yarny ends of skeins, that I'm just not getting around to using for one reason or another, so if you want this grab bag of yarny tidbits; put your name in for the drawing. I'll keep it open until Wednesday, March 16 at 5:00pm CST. Then I'll pop it in the mail for you on St. Paddy's Day(if I get your mailing address in time, of course) Good luck!
(All this yarn was lovingly cared for in a smoke-free home! I do have a doggie, but she dosen't ever get into my yarn!)

Tuesday, March 8, 2011

I'm jumping in....

How deep is it? Oops! I guess I should've asked that first before clambering and getting in way over my head! Here is the beginning of DD's college afghan. Her brother's was only a two color mascot....*sigh*.. as you can see I've already started 3 colors here and the next row starts the fourth. I hope I'm up for the task. Good thing she dosen't leave for the university until August 2011.

Sunday, March 6, 2011

Mouse Tri-Ami Free pattern!


Original pattern by Caroline Chrisco

Materials:
Small amounts of ww yarn
9mm safety
Polyester stuffing
Embroidery thread
Yarn needle
Continuous rounds; do not join.

With body color….chain 2
Rnd.1 4 sc in 2nd chain from the hook
Rnd.2 2 sc in each sc around(8sc)
Rnd.3 2sc in next stitch, then 1 sc in next stitch; repeat 3 times. (12sc)
Rnd.4 2sc in next stitch, then sc in next 2 stitches; repeat 3 times. (16sc)
Rnds.5-6 Sc in each stitch around
Rnd.7 2sc in next stitch, then sc in next 3 stitches; repeat 3 times(20sc)
Rnd.8 2sc in next stitch, then sc in next 4 stitches;repeat 3 times(24sc)
Rnd.9 2sc in next stitch, then sc in next 5 stitches; repeat 3 times(28sc)
Rnds.10-12 Sc in each stitch around
Rnd.12 2sc in next stitch, then sc in next 6 stitches: repeat 3 times(32sc)
Rnd. 13 3sc in next stitch, then sc in next 17 stitches, 3sc in next stitch, then 17sc(38sc)
Rnds 14-19 Sc in each stitch around
Fasten off, leaving a long tail for sewing the bottom up.

I attach eyes in between rounds 7 and 8
I embroider the whiskers just one row below the eyes.(I use ww yarn for these and tie knots on the ends.
Then, I embroider the mouth just below the whiskers.(I use floss for this)

Ears: (make 2) With the color you have chose for the inner ear; chain 2
Rnd. 1 6 sc in 2nd chain from hook(6sc)
Rnd. 2 2 sc in each stitch around(12sc)
Rnd. 3 Sc in next stitch, then 2sc; repeat around(18sc)
Rnd. 4 Sc in each stitch around
Change to body color.
Rnd. 5 Sc in each of next 2 stitches, then 2sc in next stitch; repeat around(24sc)
Rnd. 6 sc in each stitch around
Fasten off, leave a tail for sewing to head. (You may have to coax the ears into their final shape. I want just the last round of body color flipped over the inner ear color. Refer to picture)
Attach ears to either side of the mouse’s “head”

Stuff.
Whip stitch the bottom together. I sew a few stitches, then stuff the corner where I just came from good and tight, so it will look like a triangle when its complete. (I use the eraser end of a pencil to get the stuffing in all my corners.)
Continue stitching until you have only 2 or 3 stitches left, stuff this corner tightly and finish sewing the corner.

Tail: chain 22( or desired length) Slip stitch in second chain from hook, then slip stitch the next 2 stitches. Fasten off

Saturday, March 5, 2011

Sababdo, el quinto de marzo......

Ever wish for one of those lazy Saturdays where there was no plan? No errands? No obligations?
Well, this is not one of them for our family. This first week of march is always so hectic because both of my big kids' bdays are in the same week! I love to take my time with bdays relax, make the favorite meal, sing "Happy Birthday", meander, open gifts, wander, eat cake, but sometimes during this week it seems we're just throwing cake and gifts at each other. We are driving to see oldest DS today to help celebrate his 20th. I made cupcakes and we're going to take him for lunch. DD's 18 is Monday and its still being planned, but I think chicken Parmesan and strawberry cake are on the menu!

Some projects on the horizon.....

Here is the plan for DD college afghan. I made one for Austen here: As you can see, they will not be attending the same university. Ahhhh.......a house divided.


I am also working on this cowl called the "Gap-tastic" Cowl. You can find the pattern here, The yarn is "Charisma" from Loops and Threads(a Michael's brand) and so far I love it. squish-a-licious and so easy to work with. I'll let you know how it wears.